Table of Contents
How to Make a Perfect Dinosaur Cake: Step-by-Step Guide
Creating a dinosaur cake transforms any event into a prehistoric adventure. Whether you’re an experienced baker or a novice, this guide walks you through crafting the perfect dinosaur-themed cake, from preparation and baking to decorating and presenting. By following these steps, you’ll ensure your cake is the highlight of the celebration!
Introduction to Dinosaur Cakes
Dinosaur cakes have gained popularity for their vibrant designs, creative appeal, and ability to enchant guests of all ages. Whether it’s for a birthday or baby shower, they offer an opportunity to combine taste with artistry. In fact, they’re not just cakes; they’re edible works of art that bring your imagination to life.
For a beginner, tackling a dinosaur cake might seem overwhelming. However, with proper planning and techniques, you’ll find the process both enjoyable and rewarding.
A Brief History of Themed Cakes
Themed cakes have long been used to personalize celebrations. Over the years, their designs have evolved from simple motifs to intricate creations that reflect popular culture and personal tastes. For instance, dinosaur cakes became especially popular with the rise of dinosaur-themed movies like Jurassic Park and educational programming that captured the fascination of young minds.
In modern times, themed cakes range from realistic sculptures to cartoon-like designs. As a result, they showcase the creativity and skill of bakers worldwide. For more background on themed baking, check out this dessert platter guide for additional ideas.
Why Choose a Dinosaur Cake?
Choosing a dinosaur cake for your event comes with many benefits. First, it serves as a striking centerpiece and adds a memorable touch to the occasion. Additionally, it allows for endless creative freedom in both design and decoration.
Here are three key reasons to opt for a dinosaur cake:
- Universal Appeal: Dinosaurs are universally loved by both children and adults, making them an ideal choice for diverse gatherings.
- Creative Freedom: You can choose designs ranging from simple sheet cakes to elaborate 3D sculptures.
- Event Enhancement: Themed cakes serve as conversation starters and create lasting memories.
Moreover, if you’re looking for inspiration for other themed desserts, you can explore the ultimate guide to Italian Christmas desserts to expand your ideas.If you’re also planning decorations, check out these fun dinosaur party ideas for inspiration!”
Popular Types of Dinosaur Cakes
When selecting the type of dinosaur cake for your event, it’s important to consider your skill level and the time you have available. For instance, a beginner may prefer a simpler sheet cake, while a more experienced baker could create a sculpted masterpiece.
Here are some popular options:

- Sculpted Dinosaur Cakes: Perfect for realism and drama, these cakes require advanced skills but are breathtaking when completed.
- Sheet Cakes with Designs: Ideal for beginners, sheet cakes allow you to decorate using stencils, edible prints, or frosting.
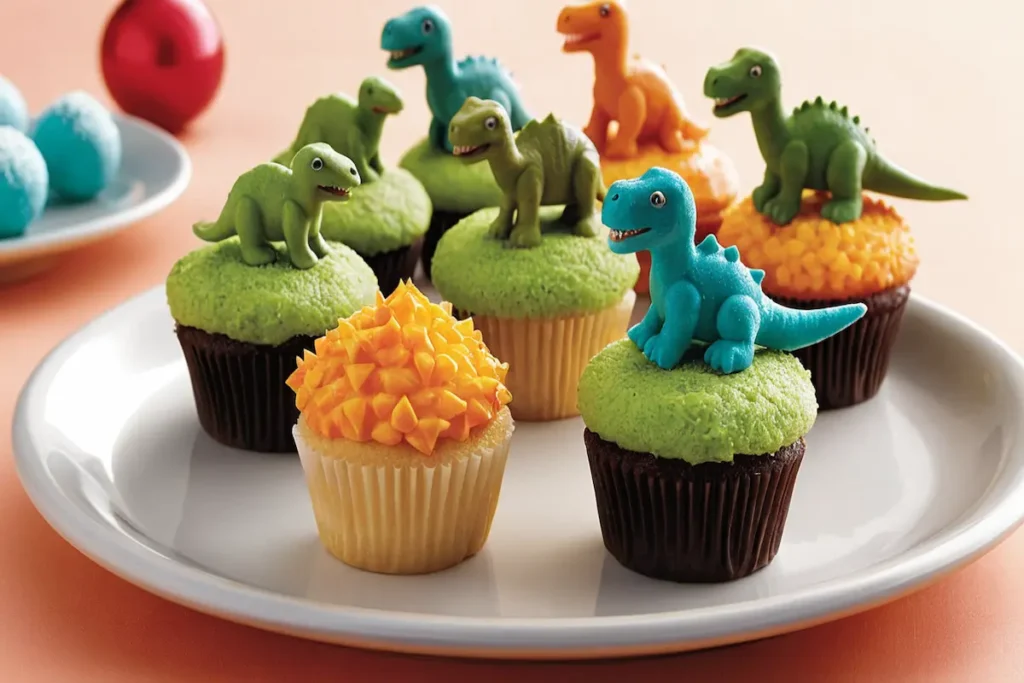
- Cupcakes and Cake Pops: These bite-sized treats are fun to serve and easy to decorate with mini dinosaur toppers.
- Volcano-Themed Dinosaur Cakes: Add an exciting twist with an erupting volcano centerpiece made from edible lava.
Planning Your Dinosaur Cake
To ensure your dinosaur cake is a success, careful planning is crucial. Without proper preparation, you may encounter unnecessary stress during the process.
1. Determine the Occasion and Theme
Begin by deciding whether your cake will feature a specific dinosaur or depict a general prehistoric scene. For example, a T-Rex might be the star for a dinosaur enthusiast, while a jungle landscape could be perfect for younger audiences.
2. Choose Flavor and Size
Next, select a flavor that will appeal to your guests. Popular options include chocolate, vanilla, and red velvet. On the other hand, you could also experiment with flavors like lemon or caramel for a unique touch. Make sure to choose a size that matches your guest list to avoid running out of servings.
3. Budget and Timeline
Finally, allocate enough time and set a realistic budget. Since baking and decorating a dinosaur cake can be time-intensive, it’s essential to plan each step carefully. Additionally, ensure you have all necessary tools and ingredients ready before you start.
Essential Tools and Ingredients
Before you start baking, gathering the right tools and ingredients will save you time and effort. For instance, having all your supplies ready can prevent unnecessary interruptions during the process.
Baking Equipment:
- Mixing bowls, measuring tools, and an electric mixer.
- Cake pans in various sizes and cooling racks.
Decorating Tools:
- Piping bags, fondant rolling pins, and edible markers.
- Dinosaur molds or cutters for detailed designs.
Ingredients:
- Basic items like flour, sugar, eggs, and butter.
- Fondant, food coloring, and edible glitter for decor.
Step-by-Step Baking Guide
1. Preparing the Batter
Follow your chosen recipe, ensuring the batter is smooth and lump-free. If you’re adding gel food coloring, do so gradually to achieve the desired hue.
2. Baking the Cake
Bake the batter in preheated pans. To ensure even cooking, rotate the pans halfway through baking. Finally, test for doneness using a toothpick; it should come out clean.
3. Cooling the Layers
Allow the layers to cool completely before removing them from the pans. This step is critical as it prevents cracking and makes decorating easier.
Designing and Decorating Your Dinosaur Cake
Decorating is the most exciting part of the process! With the right techniques, you can bring your vision to life.
Choosing a Theme
Begin by finalizing your design. Whether it’s a ferocious dinosaur or a tranquil prehistoric scene, your theme sets the stage for the decorations.
Applying Fondant
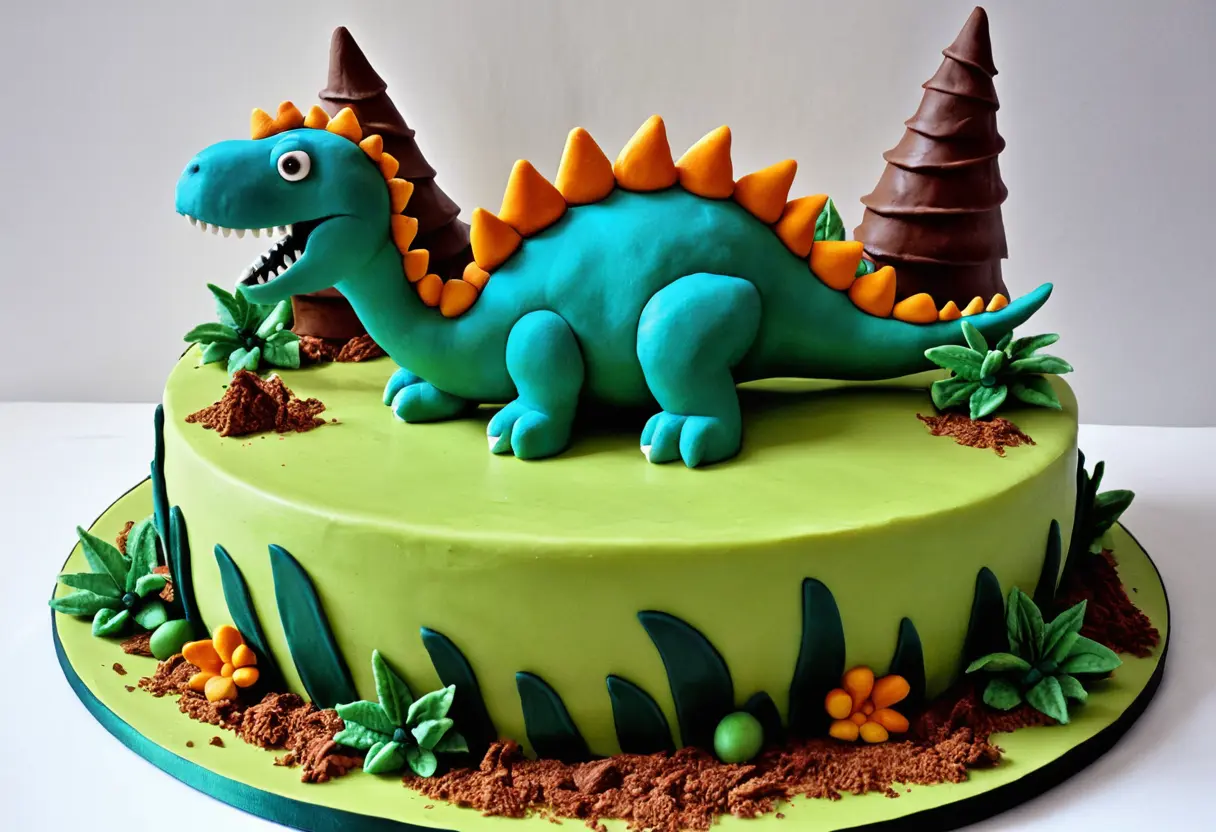
Fondant is perfect for creating a smooth, professional finish. Roll it out evenly, cover the cake, and use sculpting tools to add details like scales or spikes.
Using Buttercream Frosting
Buttercream works well for textured designs, such as grass or rocky landscapes. For instance, you can pipe green frosting for foliage or brown for dirt.
Adding Decorations
To enhance your cake’s realism:
- Use candy rocks or molded chocolates for extra details.
- Add edible glitter or airbrush shading for a polished look.
Overcoming Common Challenges
Although creating a dinosaur cake is fun, challenges can arise. To avoid setbacks, consider these tips:
- Structural Stability: Use dowels to support multi-layered or tall cakes.
- Fondant Cracking: Prevent cracking by keeping fondant pliable with glycerin or shortening.
- Color Matching: Achieve perfect hues by mixing food coloring gradually.
Creative Inspiration for Dinosaur Cakes
If you’re looking for inspiration, here are some imaginative designs to try:
- Jungle Scene: Add edible trees, foliage, and multiple dinosaurs to create a lush prehistoric jungle.
- Erupting Volcano: Use fondant or piping gel to create realistic lava flowing down a volcano centerpiece.
- Dino Dig: Incorporate edible “fossils” made from molded chocolate for a fun archaeological twist.
For more creative ideas, check out nutritious pudding recipes for kids to explore other ways to wow your guests.
Frequently Asked Questions
How long does it take to make a dinosaur cake?
Depending on the complexity, it can take 4–10 hours, including preparation, baking, and decorating.
What flavors work best for dinosaur cakes?
Classic options like chocolate or vanilla are crowd favorites. However, you can experiment with unique flavors such as lemon or caramel.
Can I use store-bought decorations?
Yes, store-bought figurines and edible toppers save time while still adding charm to your cake.
Conclusion
Making a dinosaur cake is an exciting opportunity to showcase your creativity and baking skills. By following this guide, you can create a cake that leaves your guests amazed. Ready to elevate your baking?
Print
Perfect Dinosaur Cake
- Total Time: 1 hr 15 mins
- Yield: 12 servings 1x
Description
A fun and creative dinosaur-themed cake that’s perfect for birthdays and special celebrations. This guide walks you through baking, decorating, and presenting an eye-catching dino cake!
Ingredients
For the Cake:
- 2 ½ cups all-purpose flour
- 2 ½ tsp baking powder
- ½ tsp salt
- 1 cup unsalted butter, softened
- 2 cups sugar
- 4 large eggs
- 1 tbsp vanilla extract
- 1 cup whole milk
For the Buttercream Frosting:
- 2 cups unsalted butter, softened
- 5 cups powdered sugar
- 2 tbsp milk
- 1 tbsp vanilla extract
- Green, brown, and yellow food coloring
For Decoration:
- Fondant (green, brown, white, black)
- Piping bags and tips
- Edible decorations (chocolate rocks, candy trees, dinosaur toppers)
Instructions
Step 1: Bake the Cake
- Preheat oven to 350°F (175°C). Grease and flour two 9-inch round cake pans.
- In a bowl, whisk together flour, baking powder, and salt. Set aside.
- In a large bowl, beat butter and sugar until fluffy. Add eggs one at a time, mixing well.
- Stir in vanilla, then alternate adding dry ingredients and milk until fully combined.
- Pour batter into prepared pans and bake for 40–45 minutes, or until a toothpick inserted comes out clean.
- Let cakes cool completely before decorating.
Step 2: Prepare Buttercream Frosting
- Beat butter until smooth.
- Gradually add powdered sugar, mixing well.
- Stir in milk and vanilla until smooth.
- Divide frosting into separate bowls and tint with food coloring as needed.
Step 3: Assemble & Decorate
- Stack the cake layers with a thin layer of buttercream in between.
- Use green frosting for the base color of the dinosaur landscape.
- Roll fondant into dinosaur shapes or use edible dinosaur toppers.
- Pipe brown frosting for tree trunks, use chocolate rocks for decoration, and add final details with edible markers or extra frosting.
Step 4: Serve & Enjoy!
Let the cake set in the fridge for 30 minutes before serving. Slice and enjoy your prehistoric masterpiece!
- Prep Time: 30 mins
- Cook Time: 45 mins
- Category: Dessert, Cake
- Method: Baking, Decorating
- Cuisine: American
Nutrition
- Serving Size: 1 slice
- Calories: ~450 kcal
- Sugar: 40g
- Fat: 22g
- Carbohydrates: 60g
- Fiber: 1g
- Protein: 4g
- Cholesterol: 85mg
Keywords: dinosaur cake, birthday cake, themed cakes, kids party cake, fun cake ideas


3 thoughts on “How to Make a Perfect Dinosaur Cake: Step-by-Step Guide”